CHAIN DRIVE
|
Removing the drive chain 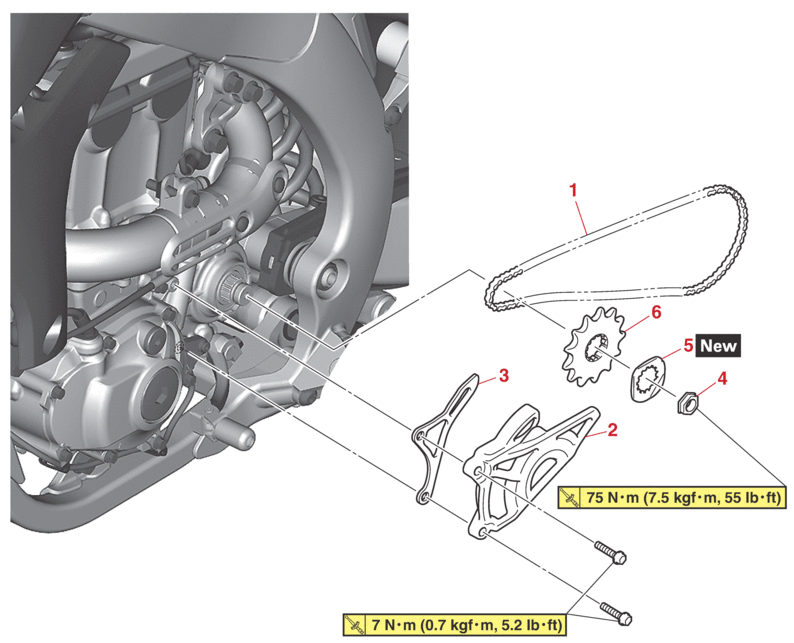 |
|||
|---|---|---|---|
|
Order |
Job/Parts to remove |
Q’ty |
Remarks |
|
|
Drive sprocket |
|
Refer to ENGINE REMOVAL. |
|
1 |
Drive chain |
1 |
|
|
2 |
Drive sprocket cover |
1 |
|
|
3 |
Bracket |
1 |
|
|
4 |
Drive sprocket nut |
1 |
|
|
5 |
Lock washer |
1 |
|
|
6 |
Drive sprocket |
1 |
|
REMOVING THE DRIVE CHAIN
1.Stand the vehicle on a level surface.
|
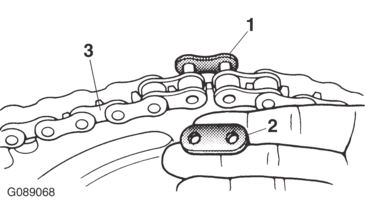
2.Remove:
-
Master link clip
-
Master link “1”
-
Master link plate “2”
-
Drive chain “3”
CHECKING THE DRIVE CHAIN
1.Measure:
-
15-link section of the drive chain
Out of specification → Replace the drive chain.
|
a.Measure the length “a” between the inner sides of the pins and the length “b” between the outer sides of the pins on a 15-link section of the drive chain as shown in the illustration.
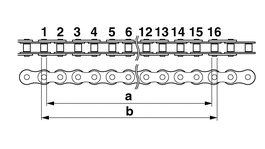
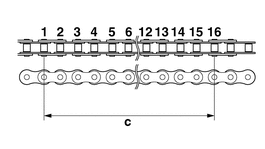
b.Calculate the length “c” of the 15-link section of the drive chain using the following formula.
Drive chain 15-link section length “c” = (length “a” between pin inner sides + length “b” between pin outer sides)/2
|
2.Check:
-
Drive chain
Stiffness → Clean, lubricate, or replace.
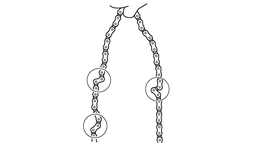
3.Clean:
-
Drive chain
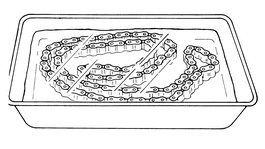
a.Wipe the drive chain with a clean cloth.
b.Put the drive chain in kerosene and remove any remaining dirt.
c.Remove the drive chain from the kerosene and completely dry it.
4.Check:
-
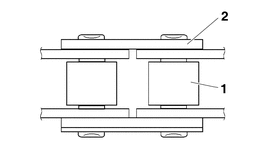
Drive chain roller “1”
Damage/wear → Replace the drive chain.
-
Drive chain side plate “2”
Damage/wear → Replace the drive chain.
5.Lubricate:
-
Drive chain
CHECKING THE DRIVE SPROCKET
1.Check:
-
Drive sprocket
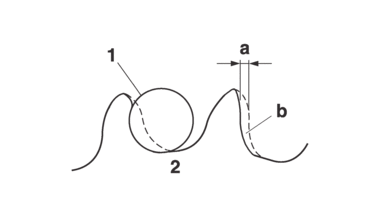
More than 1/4 tooth wear “a”→ Replace the drive sprocket and the rear wheel sprocket as a set.
Bent tooth → Replace the drive sprocket and the rear wheel sprocket as a set.
|
b. |
Correct |
|
1. |
Drive chain roller |
|
2. |
Drive sprocket |
CHECKING THE REAR WHEEL SPROCKET
INSTALLING THE DRIVE CHAIN
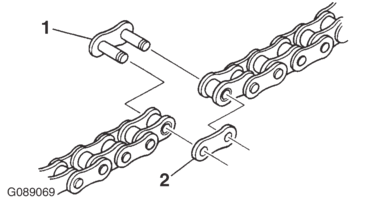
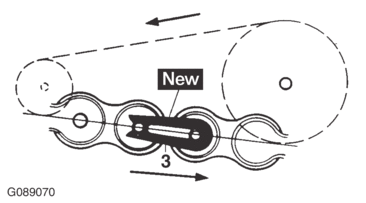
1.Install:
-
Master link “1”
-
Master link plate “2”
-
Master link clip “3”

|
2.Lubricate:
-
Drive chain
3.Install:
-
Drive sprocket
-
Lock washer

-
Drive sprocket nut
Refer to ENGINE REMOVAL.
|
|
4.Adjust:
-
Drive chain slack
Refer to DRIVE CHAIN SLACK.
|
|


