ELECTRIC STARTER

|
Removing the starter motor 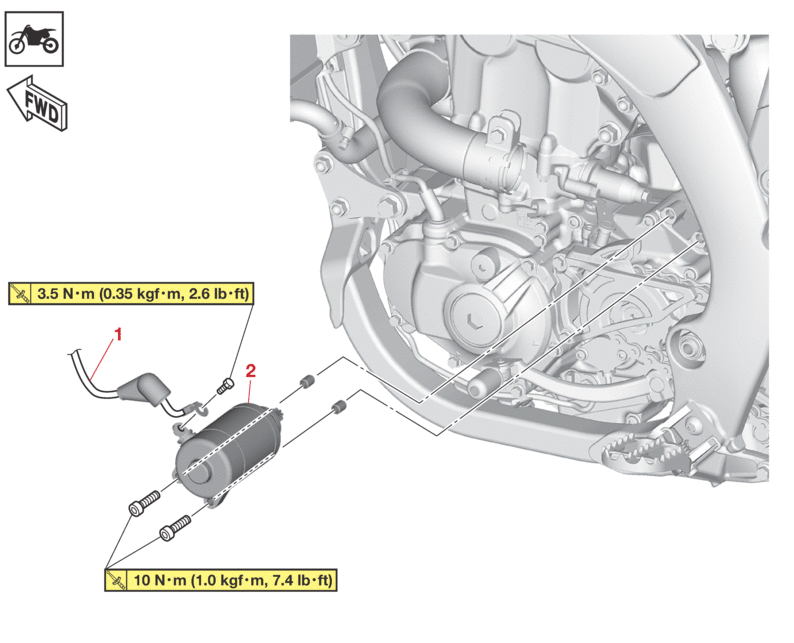 |
|||
|---|---|---|---|
|
Order |
Job/Parts to remove |
Q’ty |
Remarks |
|
|
Exhaust pipe |
|
Refer to ENGINE REMOVAL. |
|
1 |
Starter motor lead |
1 |
|
|
2 |
Starter motor |
1 |
|
|
Disassembling the starter motor 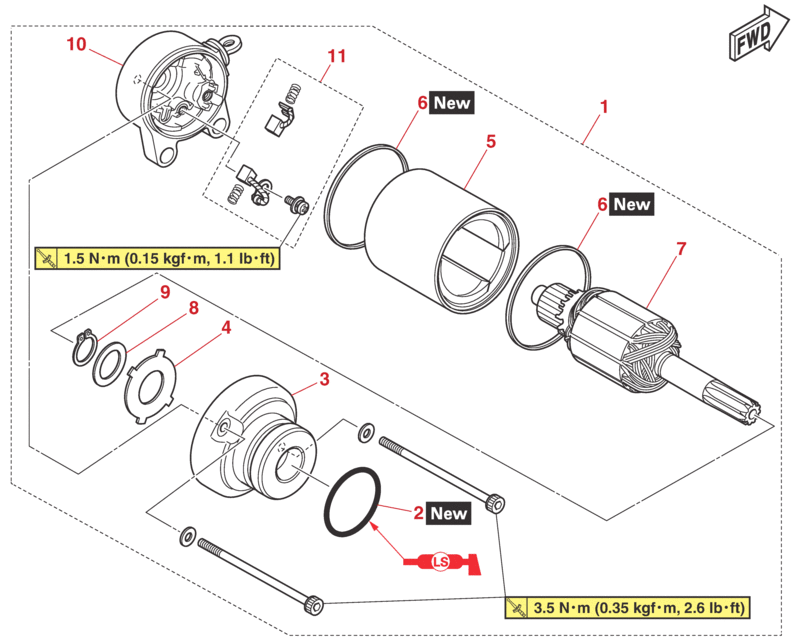 |
|||
|---|---|---|---|
|
Order |
Job/Parts to remove |
Q’ty |
Remarks |
|
1 |
Starter motor assembly |
1 |
|
|
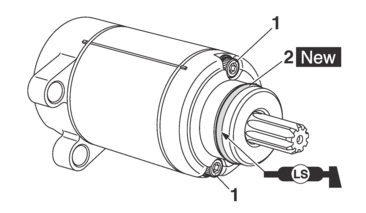
2 |
O-ring |
1 |
|
|
3 |
Starter motor front cover |
1 |
|
|
4 |
Washer |
1 |
Starter motor front cover |
|
5 |
Starter motor yoke |
1 |
|
|
6 |
Gasket |
2 |
|
|
7 |
Armature assembly |
1 |
|
|
8 |
Washer |
1 |
|
|
9 |
Circlip |
1 |
|
|
10 |
Starter motor rear cover |
1 |
|
|
11 |
Brush set |
1 |
|
CHECKING THE STARTER MOTOR
1.Check:
-
Commutator
Dirt → Clean with 600 grit sandpaper.
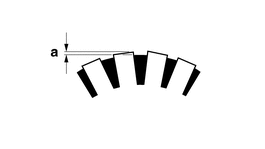
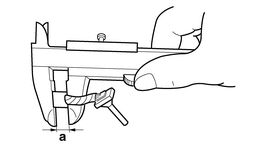
2.Measure:
-
Mica undercut “a”
Out of specification → Scrape the mica to the proper measurement with a hacksaw blade that has been grounded to fit the commutator.
|

|

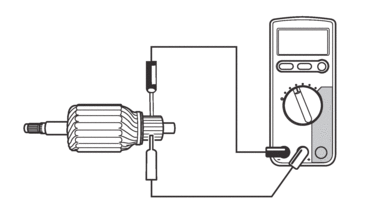
3.Check:
-
Armature assembly
a.Connect the digital circuit tester to the armature coil and check the continuity.
|

b.If there is no continuity, replace the starter motor.
4.Measure:
-
Brush length “a”
Out of specification → Replace the brush set.
|
5.Measure:
-
Brush spring force
Out of specification → Replace the brush set.
|
6.Check:
-
Gear teeth
Damage/wear → Replace the starter motor.
7.Check:
-
Oil seal
Damage/wear → Replace the defective part(s).
ASSEMBLING THE STARTER MOTOR
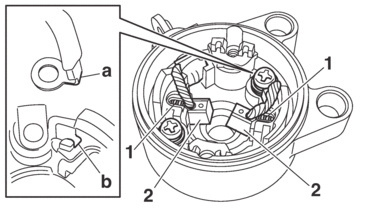
1.Install:
-
Brush spring “1”
-
Brush “2”
|
2.Install:
-
Armature assembly “1”
Install while holding down the brush using a thin screw driver.
|


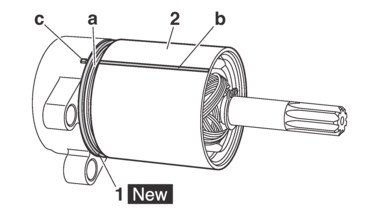
3.Install:
-
Gasket “1”

-
Starter motor yoke “2”
|
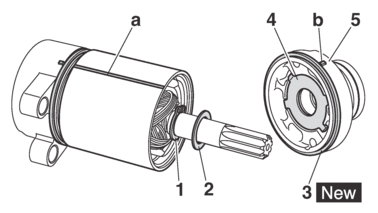
4.Install:
-
Circlip “1”
-
Plain washer “2”
-
Gasket “3”
-
Washer (starter motor front cover) “4”
-
Starter motor front cover “5”
|
5.Install:
-
Bolt “1”
-
O-ring “2”
|
6.Install:
-
Starter motor
-
Starter motor bolt
|