REAR WHEEL

|
Removing the rear wheel 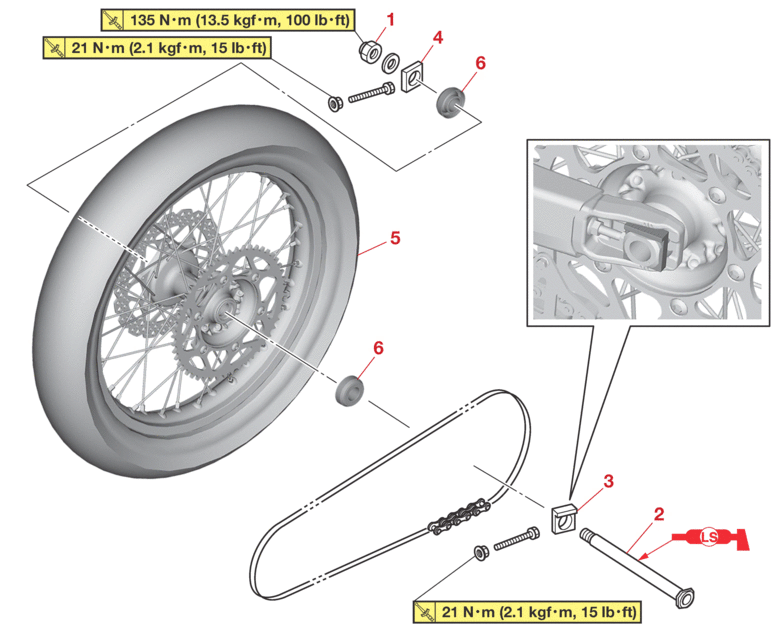 |
|||
|---|---|---|---|
|
Order |
Job/Parts to remove |
Q’ty |
Remarks |
|
|
|
|
Use a maintenance stand to raise the rear wheel off the ground. |
|
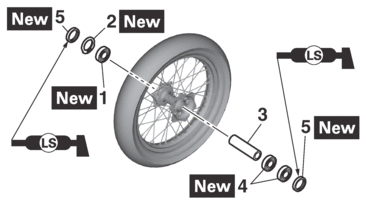
1 |
Rear wheel axle nut |
1 |
|
|
2 |
Rear wheel axle |
1 |
|
|
3 |
Drive chain puller (left) |
1 |
|
|
4 |
Drive chain puller (right) |
1 |
|
|
5 |
Rear wheel |
1 |
|
|
6 |
Collar |
2 |
|
|
Disassembling the rear wheel 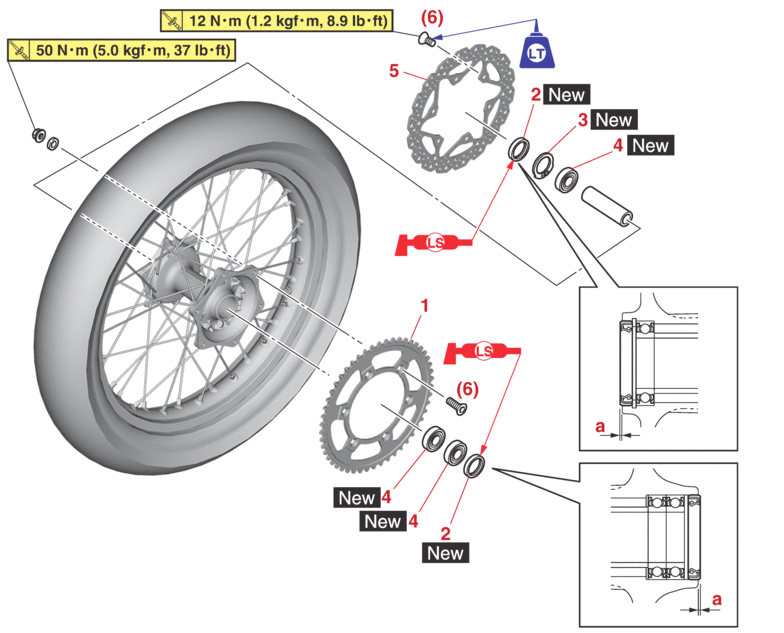 |
|||
|---|---|---|---|
|
Order |
Job/Parts to remove |
Q’ty |
Remarks |
|
1 |
Rear wheel sprocket |
1 |
|
|
2 |
Oil seal |
2 |
[“a” = Approx. 1.0 mm (0.04 in)] |
|
3 |
Circlip |
1 |
|
|
4 |
Bearing |
3 |
|
|
5 |
Brake disc |
1 |
|
REMOVING THE REAR WHEEL
1.Use a maintenance stand to raise the rear wheel off the ground.
|

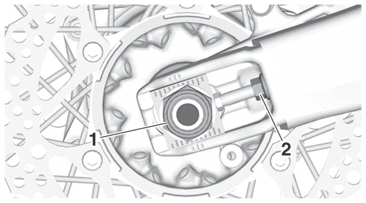
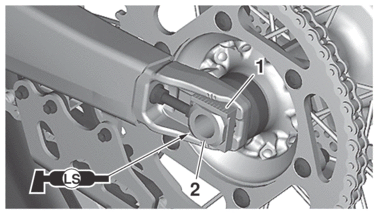
2.Remove:
-
Rear wheel axle nut “1”
3.Loosen:
-
Locknut “2”
4.Tighten:
-
Adjusting bolt “3”
5.Remove:
-
Rear wheel axle
-
Rear wheel
|

DISASSEMBLING THE REAR WHEEL
1.Remove:
-
Oil seal
-
Bearing
Refer to DISASSEMBLING THE FRONT WHEEL.
CHECKING THE REAR WHEEL
1.Check:
-
Rear wheel axle
-
Rear wheel
-
Bearing
-
Oil seal
Refer to CHECKING THE FRONT WHEEL.
2.Check:
-
Tire
-
Rear wheel
Damage/wear → Replace.
Refer to CHECKING THE TIRES and CHECKING THE WHEELS.
3.Check:
-
Spoke
Refer to CHECKING AND TIGHTENING THE SPOKES.
4.Measure:
-
Radial wheel runout
-
Lateral wheel runout
Refer to CHECKING THE FRONT WHEEL.
|

CHECKING AND REPLACING THE REAR WHEEL SPROCKET
1.Check:
-
Rear wheel sprocket
More than 1/4 tooth wear “a”→ Replace the rear wheel sprocket and the drive sprocket as a set.
Bent tooth → Replace the rear wheel sprocket and the drive sprocket as a set.
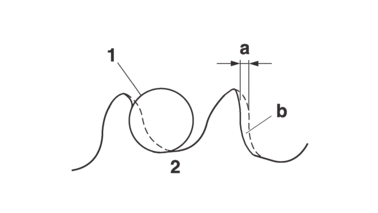
|
b. |
Correct |
|
1. |
Drive chain roller |
|
2. |
Rear wheel sprocket |
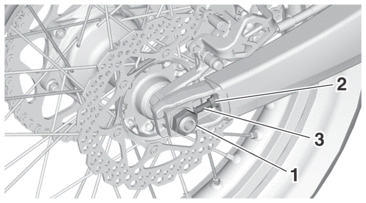
2.Replace:
-
Rear wheel sprocket
a.Remove the self-locking nuts and the rear wheel sprocket.
b.Clean the rear wheel drive hub with a clean cloth, especially the surfaces that contact the sprocket.
c.Install the new rear wheel sprocket.
|

|
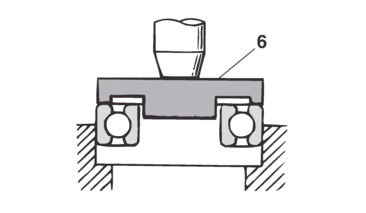
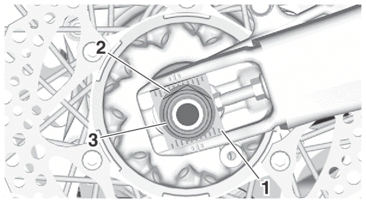
ASSEMBLING THE REAR WHEEL
1.Install:
-
Bearing (right side) “1”

-
Circlip “2”
-
Spacer “3”
-
Bearing (left side) “4”
-
Oil seal “5”

|
|

|
2.Install:
-
Brake disc
-
Brake disc bolt
|
|
3.Install:
-
Collar “1”
|

INSTALLING THE REAR WHEEL
1.Install:
-
Rear wheel
|
2.Install:
-
Drive chain “1”
|

3.Install:
-
Drive chain puller (left) “1”
-
Rear wheel axle “2”
|
4.Install:
-
Drive chain puller (right) “1”
-
Washer “2”
-
Rear wheel axle nut “3”
|
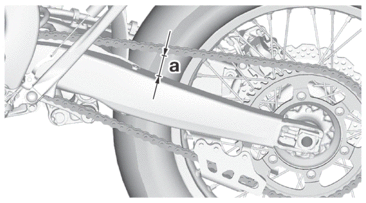
5.Adjust:
-
Drive chain slack “a”
|
Refer to DRIVE CHAIN SLACK.
6.Tighten:
-
Rear wheel axle nut “1”
|
-
Locknut “2”
|