CHAIN DRIVE

|
Removing the drive chain 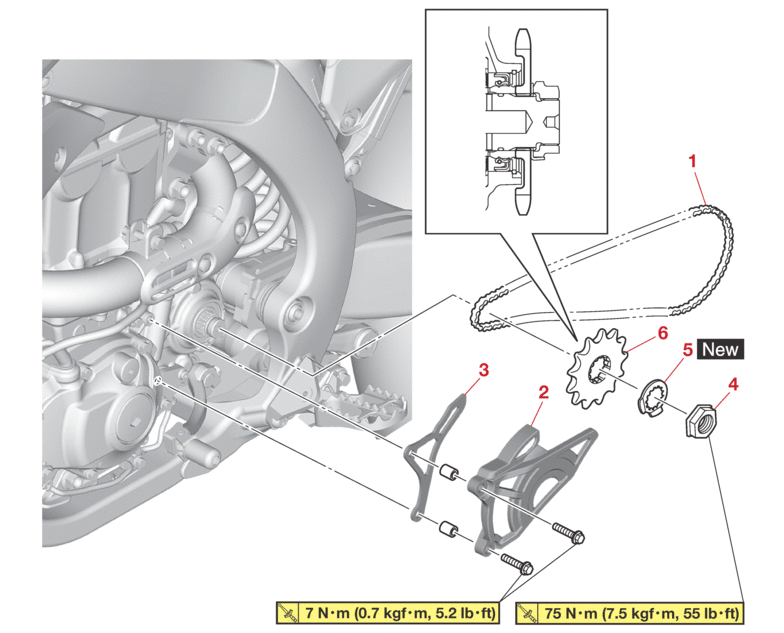 |
|||
|---|---|---|---|
|
Order |
Job/Parts to remove |
Q’ty |
Remarks |
|
1 |
Drive chain |
1 |
|
|
2 |
Drive sprocket cover |
1 |
|
|
3 |
Drive chain guide |
1 |
|
|
4 |
Drive sprocket nut |
1 |
|
|
5 |
Lock washer |
1 |
|
|
6 |
Drive sprocket |
1 |
|
REMOVING THE DRIVE CHAIN
1.Stand the vehicle on a level surface.
|

|

2.Remove:
-
Drive chain
|
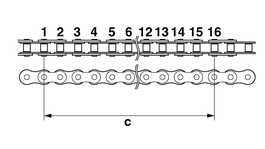
CHECKING THE DRIVE CHAIN
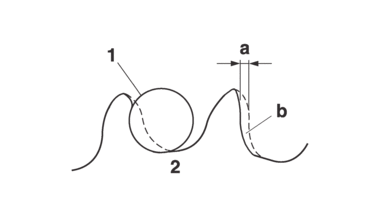
1.Measure:
-
15-link section of the drive chain
Out of specification → Replace the drive chain.
|

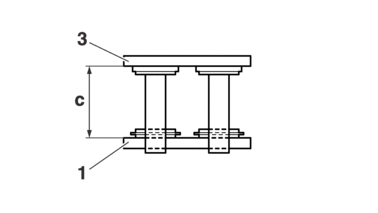
a.Measure the length “a” between the inner sides of the pins and the length “b” between the outer sides of the pins on a 15-link section of the drive chain as shown in the illustration.

b.Calculate the length “c” of the 15-link section of the drive chain using the following formula.
Drive chain 15-link section length “c” = (length “a” between pin inner sides + length “b” between pin outer sides)/2
|
2.Check:
-
Drive chain
Stiffness → Clean, lubricate, or replace.
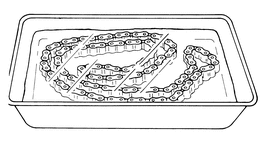
3.Clean:
-
Drive chain
a.Wipe the drive chain with a clean cloth.
b.Put the drive chain in kerosene and remove any remaining dirt.
c.Remove the drive chain from the kerosene and completely dry it.
|


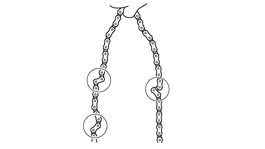
4.Check:
-
O-ring “1”
Damage → Replace the drive chain.
-
Drive chain roller “2”
Damage/wear → Replace the drive chain.
-
Drive chain side plate “3”
Damage/wear → Replace the drive chain.
5.Lubricate:
-
Drive chain
|

CHECKING THE DRIVE SPROCKET
1.Check:
-
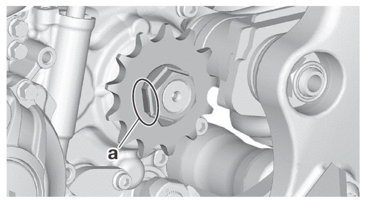
Drive sprocket
More than 1/4 tooth wear “a”→ Replace the drive sprocket and the rear wheel sprocket as a set.
Bent tooth → Replace the drive sprocket and the rear wheel sprocket as a set.
|
b. |
Correct |
|
1. |
Drive chain roller |
|
2. |
Drive sprocket |
CHECKING THE REAR WHEEL SPROCKET
INSTALLING THE DRIVE CHAIN
1.Install:
-
Drive chain
|
|
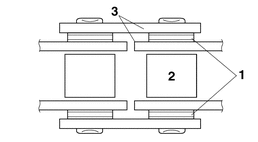
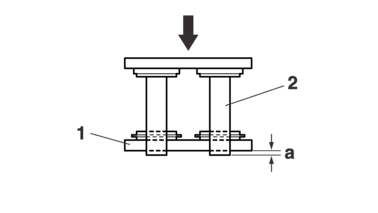
a.When press fitting the master link plate “1”, make sure the space “a” between the end of the connecting pin “2” and the master link plate is 1.2–1.4 mm (0.05–0.06 in).
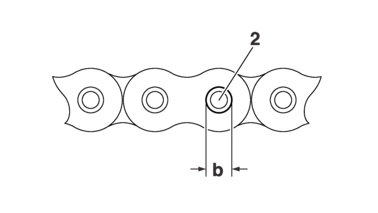
b.After riveting, make sure the diameter between the edges “b” of the connecting pin “2” is 5.5–5.8 mm (0.22–0.23 in).
c.After riveting, make sure the space “c”, which is inside of the master link “3” and inside of the master link plate “1”, is 12.1–12.3 mm (0.476–0.484 in).
2.Lubricate:
-
Drive chain
|
3.Install:
-
Drive sprocket
-
Lock washer

-
Drive sprocket nut
|

|
|
4.Adjust:
-
Drive chain slack
Refer to DRIVE CHAIN SLACK.
|
|