CAMSHAFT

|
Removing the cylinder head cover 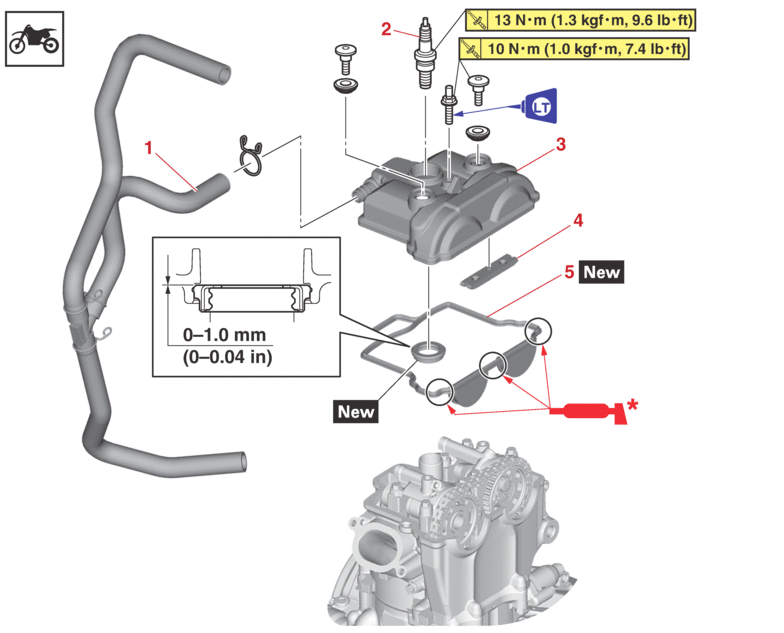 * Yamaha bond No. 1215 (Three bond No. 1215®) |
|||
|---|---|---|---|
|
Order |
Job/Parts to remove |
Q’ty |
Remarks |
|
|
Seat |
|
Refer to GENERAL CHASSIS. |
|
|
Side cover (left/right) |
|
Refer to GENERAL CHASSIS. |
|
|
Shroud (left/right) |
|
Refer to GENERAL CHASSIS. |
|
|
Fuel tank |
|
Refer to FUEL TANK. |
|
|
Spark plug cap |
|
Disconnect. Refer to THROTTLE BODY. |
|
1 |
Cylinder head breather hose |
1 |
|
|
2 |
Spark plug |
1 |
|
|
3 |
Cylinder head cover |
1 |
|
|
4 |
Timing chain guide (top side) |
1 |
|
|
5 |
Cylinder head cover gasket |
1 |
|
|
Removing the camshaft 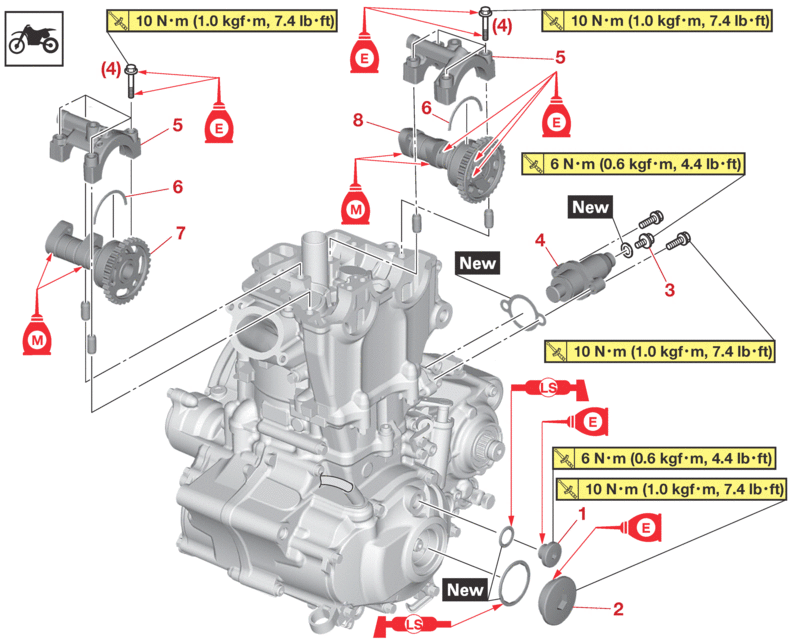 |
|||
|---|---|---|---|
|
Order |
Job/Parts to remove |
Q’ty |
Remarks |
|
1 |
Timing mark accessing screw |
1 |
|
|
2 |
Crankshaft end accessing screw |
1 |
|
|
3 |
Timing chain tensioner cap bolt |
1 |
|
|
4 |
Timing chain tensioner |
1 |
|
|
5 |
Camshaft cap |
2 |
|
|
6 |
Clip |
2 |
|
|
7 |
Intake camshaft |
1 |
|
|
8 |
Exhaust camshaft |
1 |
|
REMOVING THE CAMSHAFT
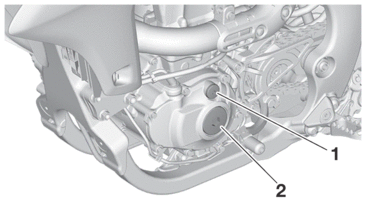
1.Remove:
-
Timing mark accessing screw “1”
-
Crankshaft end accessing screw “2”
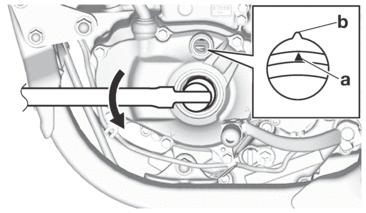
2.Align:
-
Alignment mark
a.Turn the crankshaft counterclockwise with a wrench.
b.Align the top dead center (TDC) mark “a” on the generator rotor with the alignment mark “b” on the crankcase cover.
|

3.Remove:
-
Timing chain tensioner cap bolt “1”
-
Timing chain tensioner “2”
-
Gasket
4.Remove:
-
Bolt (camshaft cap) “1”
-
Camshaft cap “2”
-
Clip “3”
|
|

5.Remove:
-
Exhaust camshaft “1”
-
Intake camshaft “2”
|

CHECKING THE CAMSHAFT
1.Check:
-
Camshaft lobe
Blue discoloration/pitting/scratches → Replace the camshaft.
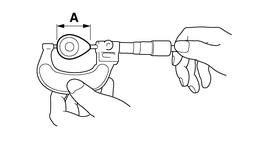
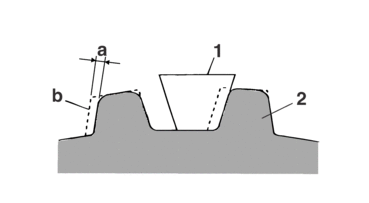
2.Measure:
-
Camshaft lobe dimensions “A”
Out of specification → Replace the camshaft.
|

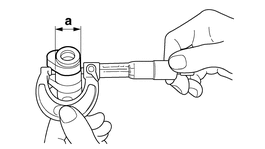
3.Measure:
-
Camshaft-journal-to-camshaft-cap clearance
Out of specification → Measure the camshaft journal diameter.
|
a.Install the camshaft into the cylinder head.
b.Position a strip of Plastigauge®“1” onto the camshaft journal as shown.
c.Install the dowel pins and the camshaft caps.
|
|

d.Remove the camshaft caps and then measure the width of the Plastigauge®“1”.
4.Measure:
-
Camshaft journal diameter “a”
Out of specification → Replace the camshaft.
Within specification → Replace the cylinder head and the camshaft caps as a set.
|
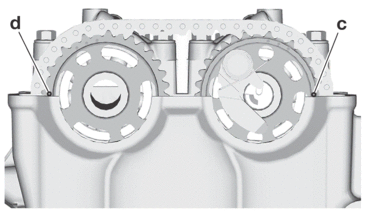
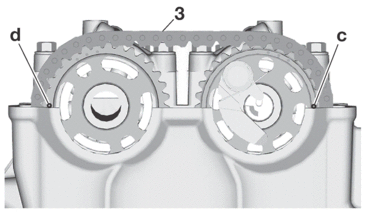
CHECKING THE TIMING CHAIN AND CAMSHAFT SPROCKET
1.Check:
-
Timing chain “1”
Damage/stiffness → Replace the timing chain and camshaft as a set.
2.Check:
-
Camshaft sprocket
More than 1/4 tooth wear “a”→ Replace the camshaft and the timing chain as a set.
|
a. |
1/4 tooth |
|
b. |
Correct |
|
1. |
Timing chain roller |
|
2. |
Camshaft sprocket |
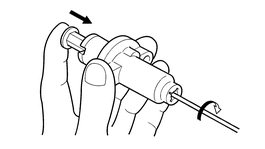
CHECKING THE TIMING CHAIN TENSIONERS
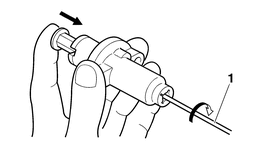
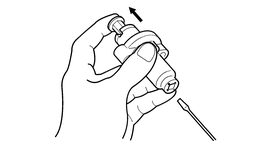
1.Check:
-
Timing chain tensioner
Crack/damage → Replace.
a.While pressing the tensioner rod lightly with your fingers, use a thin screwdriver “1” to wind the tensioner rod up fully clockwise.
b.When releasing the screwdriver by pressing lightly with your fingers, make sure that the tensioner rod will come out smoothly.
c.If not, replace the tensioner assembly.
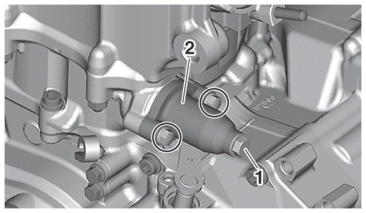
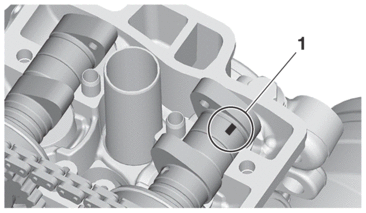
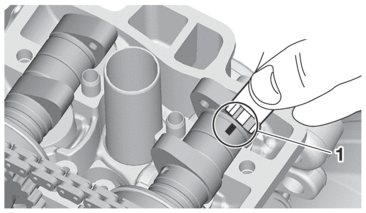
CHECKING THE DECOMPRESSION SYSTEM
1.Check:
-
Decompression system
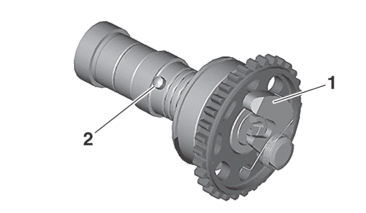
a.Check that the decompressor cam “1” moves smoothly.
b.Check that the decompressor lever pin “2” projects from the camshaft.
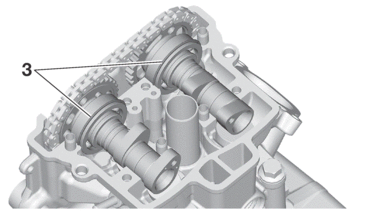
INSTALLING THE CAMSHAFTS
1.Install:
-
Exhaust camshaft “1”
-
Intake camshaft “2”
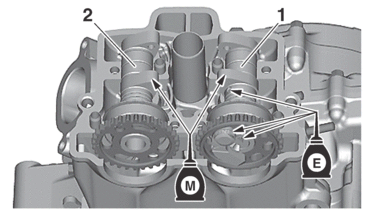
a.Turn the crankshaft counterclockwise with a wrench.
|

b.Align the top dead center (TDC) mark “a” on the generator rotor with the alignment mark “b” on the crankcase cover.
c.Fit the timing chain “3” onto both camshaft sprockets and install the camshafts on the cylinder head.
|
|
d.Install the clips, the camshaft caps and the bolts (camshaft cap).
|
|
|
2.Install:
-
Timing chain tensioner
a.While pressing the tensioner rod lightly with your fingers, use a thin screwdriver to wind the tensioner rod up fully clockwise.
b.With the tensioner rod fully wound and the chain tensioner “UP” mark “a” facing upward, install the gasket “1”, the timing chain tensioner “2” and tighten the bolts “3”.
|
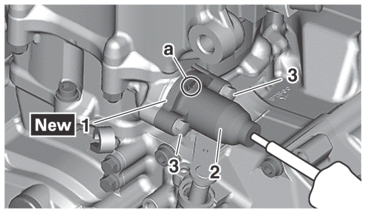
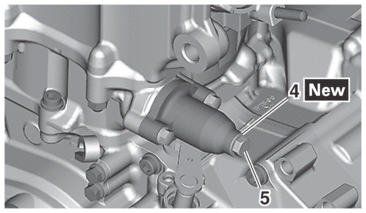
c.Release the screwdriver, check that the tensioner rod comes out smoothly, and tighten the gasket “4” and the cap bolt “5”.
|
3.Turn:
-
Crankshaft
Counterclockwise several turns.
4.Check:
-
Top dead center (TDC) mark on the generator rotor
Align with the crankcase alignment mark.
-
Camshaft match marks
Align with the cylinder head surface.
Out of alignment → Adjust.
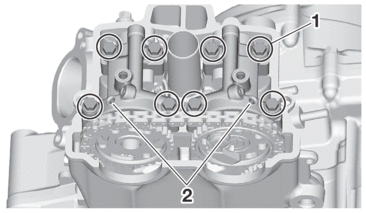
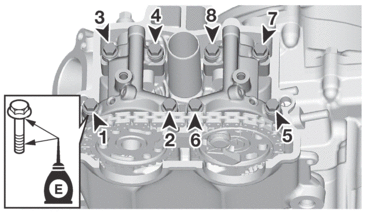
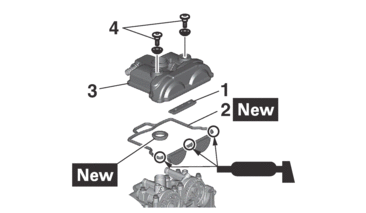
5.Install:
-
Timing chain guide (top side) “1”
-
Cylinder head cover gasket “2”

-
Cylinder head cover “3”
-
Bolt (cylinder head cover) “4”
|
|
|

6.Install:
-
Cylinder head breather hose
-
Spark plug
|