Multi-function meter unit
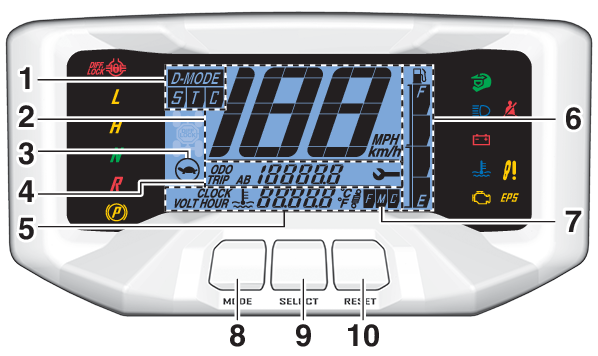
- D-mode indicator (if equipped)
- Speedometer
- Speed management icon “
 ”
” - Odometer/Tripmeter A/Tripmeter B/Service tripmeter/Error code display
- Clock/Hour meter/Voltage display/Coolant temperature display
- Fuel gauge
- Suspension mode indicator (if equipped)
- “MODE” button
- “SELECT” button
- “RESET” button
The multi-function meter unit is equipped with the following:
- speedometer
- odometer
- tripmeters
- clock
- hour meter
- voltage display
- coolant temperature display
- speed management icon
- fuel gauge
- D-mode indicator (if equipped)
- suspension mode indicator (if equipped)
- brightness control mode
- error code display
Speedometer
The speedometer shows the vehicle’s traveling speed. The speedometer can be set to “MPH” or “km/h”. This also changes the odometer and tripmeter units between miles and kilometers. To change the display between “MPH” and “km/h”, turn the key to “ ” (off), then while holding the “SELECT” button pushed, turn the key to “
 ” (on).
Odometer and tripmeters
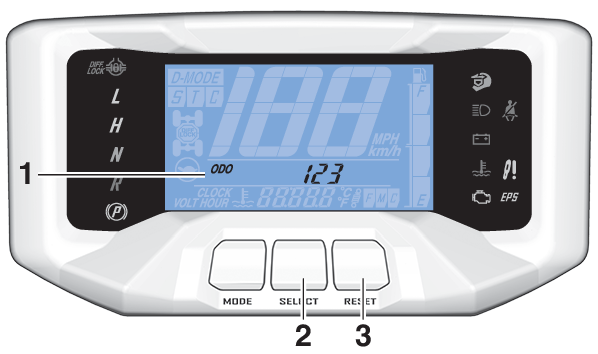
- Odometer/Tripmeter A/Tripmeter B/Service tripmeter/Error code display
- “SELECT” button
- “RESET” button
The odometer shows the total distance traveled by the vehicle.
The tripmeters show the distance traveled since they were last reset. The tripmeters can be used to record the distance traveled on a single trip, or to estimate the distance that can be traveled with a full tank of gas, etc. The service tripmeter shows the distance traveled since it was reset at the last maintenance.
Push the “SELECT” button to switch between the odometer “ODO”, the tripmeters “TRIP A” and “TRIP B”, and the service tripmeter “ ” in the following order:
ODO → TRIP A → TRIP B →  → ODO
→ ODO
To reset a tripmeter, set the display to the tripmeter you want to reset, then push the “RESET” button until it is reset.
- The odometer will lock at 199999.
- The tripmeters will reset and continue counting after 9999.9 is reached.
Clock, hour meter, voltage display and coolant temperature display
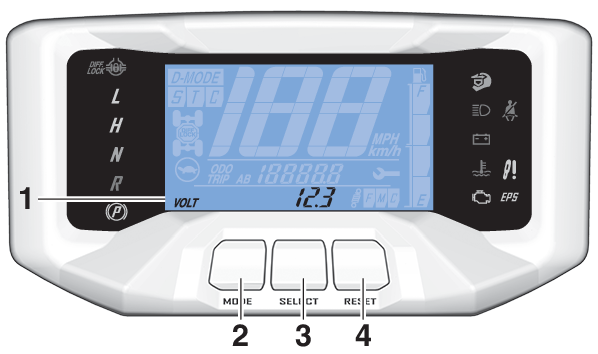
- Clock/Hour meter/Voltage display/Coolant temperature display
- “MODE” button
- “SELECT” button
- “RESET” button
The clock displays time in 12-hour format. The hour meter shows the total time the engine has been running. The voltage display shows the battery voltage. The coolant temperature display shows the temperature of the coolant.
Push the “MODE” button to switch between the clock “CLOCK”, the hour meter “HOUR”, the voltage display “VOLT”, and the coolant temperature display “ ” in the following order:
CLOCK → HOUR → VOLT →  → CLOCK
To set the clock
Set the display to the clock.
Push both the “SELECT” button and “RESET” button until the hour digits start flashing.
Use the “RESET” button to set the hours.
Push the “SELECT” button, and the minute digits will start flashing.
Use the “RESET” button to set the minutes.
Push the “SELECT” button, and then release it to start the clock.
Voltage display
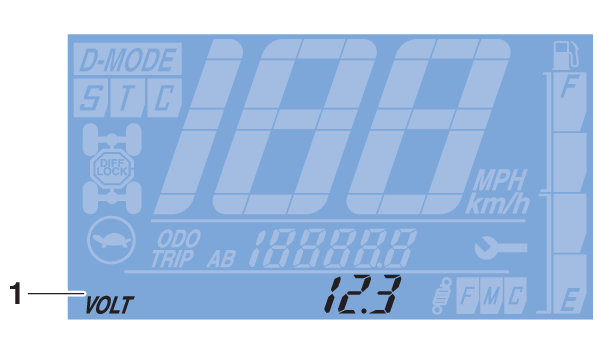
- Voltage display
This display shows the battery voltage. If the battery voltage is less than 10 volts, “Lo” is displayed, and if the voltage is above 18 volts, “Hi” is displayed.
If the voltage display indicates “Lo” or “Hi”, there may be trouble with the battery charging circuit or the battery may be faulty. If this occurs, have a Yamaha dealer check or repair the vehicle.
Coolant temperature display
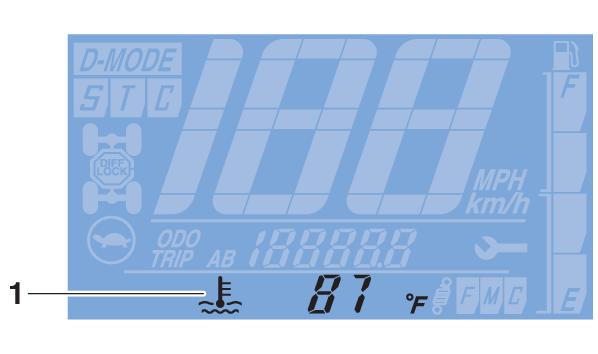
- Coolant temperature display
When the coolant is in normal operating temperature range, the temperature is displayed. When the coolant temperature is low, “Lo” will be displayed. When the coolant temperature rises, the coolant temperature display will begin to flash. If the coolant temperature continues to rise, the message “Hi” will flash.
- The coolant temperature display can be set to “°C” or “°F”. To switch the temperature units, turn the key to “
 ” (off), then while holding the “RESET” button pushed, turn the key to “
 ” (on).
 - The radiator fan turns on and off automatically according to the coolant temperature.
- The coolant temperature display can be set to “°C” or “°F”. To switch the temperature units, turn the key to “
Speed management icon
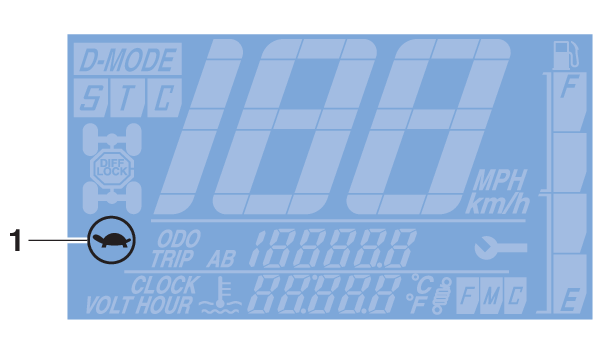
- Speed management icon “
 ”
”
This indicator comes on when the speed limiter is turned on.
Fuel gauge
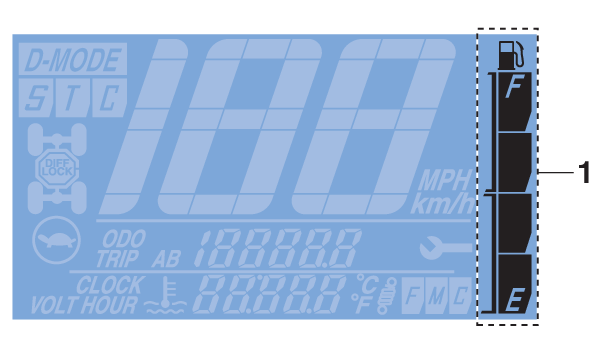
- Fuel gauge
The fuel gauge indicates the amount of fuel in the fuel tank. The display segments of the fuel gauge disappear from “F” (full) towards “E” (empty) as the fuel level decreases. When the last segment starts flashing, approximately 9.5 L (2.51 US gal, 2.09 Imp.gal) of fuel remains. Refuel as soon as possible.
If the electrical circuit for the fuel gauge is not working correctly, all display segments will flash repeatedly. Have a Yamaha dealer check the vehicle.
D-mode indicator (if equipped)
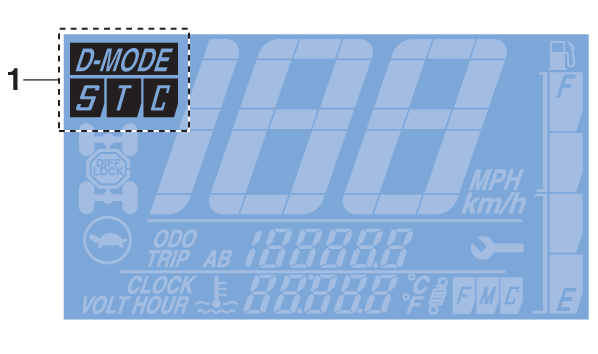
- D-mode indicator (if equipped)
The D-mode indicator shows which mode is currently selected: “S” (SPORT), “T” (TRAIL) or “C” (CRAWL). For more details on the modes and how to select them, see page .
Suspension mode indicator (if equipped)
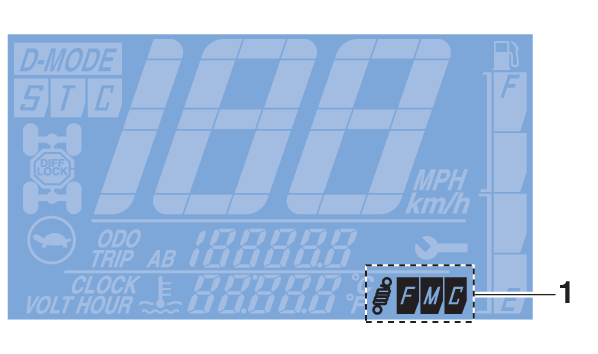
- Suspension mode indicator (if equipped)
The suspension mode indicator shows which mode is currently selected: “F” (FIRM), “M” (MEDIUM) or “C” (COMFORT). For more details on the modes and how to select them, see page .
Brightness control mode
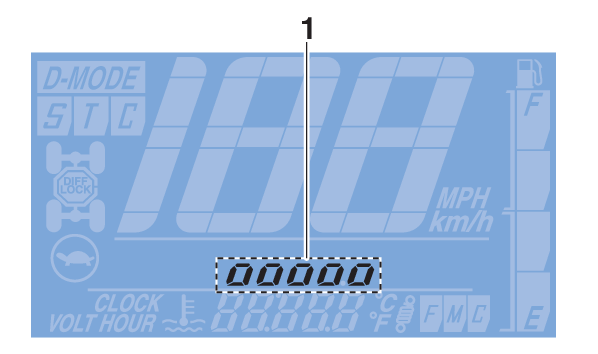
- Brightness level display
This mode allows you to adjust the brightness of the multi-function meter unit when the vehicle is stopped.
To adjust the brightness
Push the “SELECT” button until the brightness level is displayed.
Use the “RESET” button to set the brightness level.
Push the “SELECT” button to confirm the selected brightness level and exit the brightness control mode.
Error code display
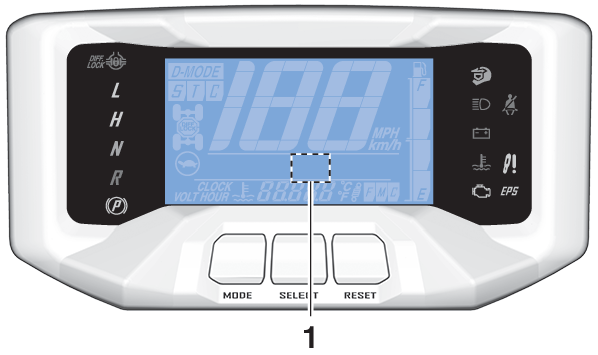
- Error code display
This model is equipped with a self-diagnostic device for various electrical circuits.
If a problem is detected in any of those circuits, the warning lights will come on or flash, and the display will indicate an error code.
If the display indicates an error code, note the code number and have a Yamaha dealer check the vehicle.
If the multi-function display indicates an error code, the vehicle should be checked as soon as possible in order to avoid engine damage.
 ” (on) position, the D-mode function is deactivated and the D-mode indicator disappears.