RADIATOR

|
Removing the radiator 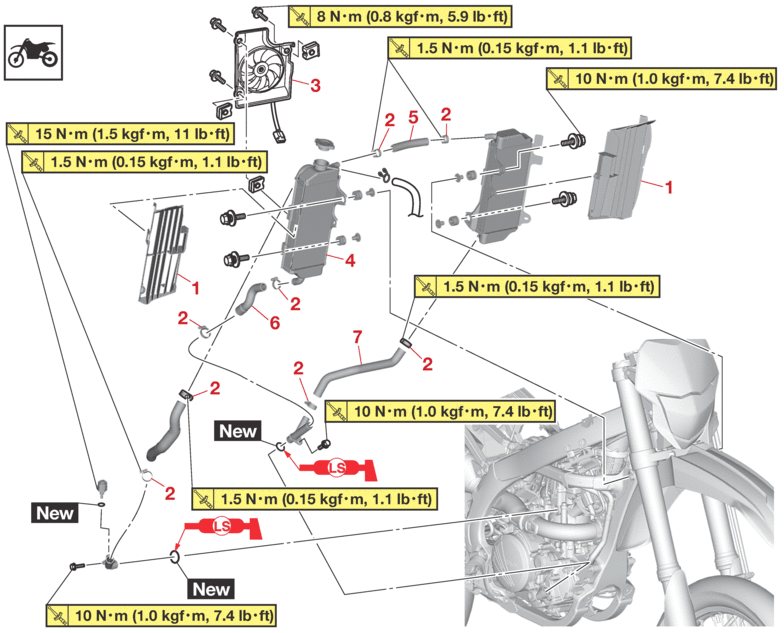 |
|||
|---|---|---|---|
|
Order |
Job/Parts to remove |
Q’ty |
Remarks |
|
|
Coolant |
|
Drain. Refer to CHANGING THE COOLANT. |
|
|
Seat/Side cover (left/right)/Shroud (left/right) |
|
Refer to GENERAL CHASSIS. |
|
|
Fuel tank |
|
Refer to FUEL TANK. |
|
|
Air filter case |
|
Refer to THROTTLE BODY. |
|
1 |
Radiator guard |
2 |
|
|
2 |
Radiator hose clamp |
8 |
Loosen. |
|
3 |
Radiator fan |
1 |
|
|
4 |
Radiator (right) |
1 |
|
|
5 |
Radiator hose 2 |
1 |
|
|
6 |
Radiator hose 4 |
1 |
|
|
7 |
Radiator hose 3 |
1 |
|
|
Removing the radiator 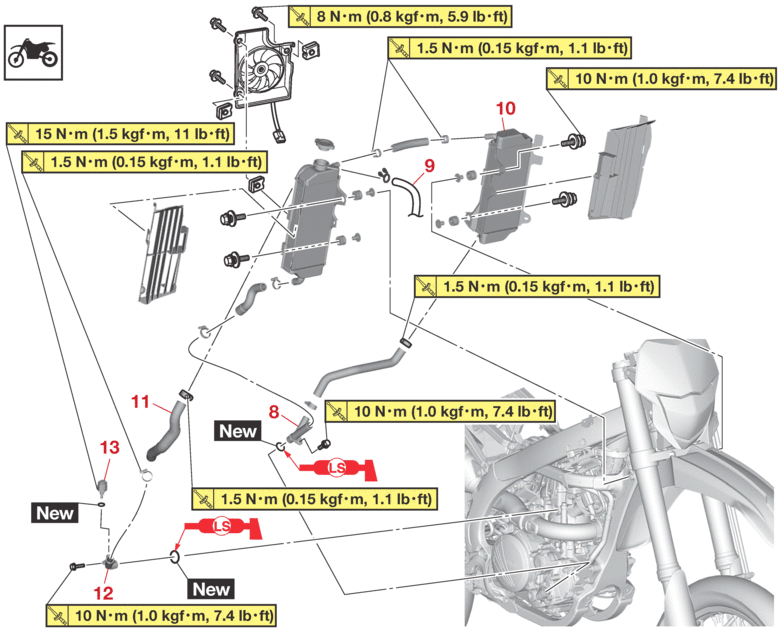 |
|||
|---|---|---|---|
|
Order |
Job/Parts to remove |
Q’ty |
Remarks |
|
8 |
Radiator pipe 2 |
1 |
|
|
9 |
Radiator breather hose |
1 |
|
|
10 |
Radiator (left) |
1 |
|
|
11 |
Radiator hose 1 |
1 |
|
|
12 |
Radiator pipe 1 |
1 |
|
|
13 |
Coolant temperature sensor |
1 |
|
CHECKING THE RADIATOR
|
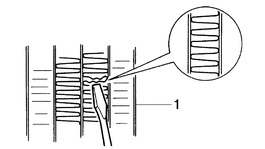
1.Check:
-
Radiator fin “1”
Obstructions → Clean.
Apply compressed air to the rear of the radiator.
Damage → Repair or replace.
|

2.Check:
-
Radiator hose
-
Radiator pipe
Crack/damage → Replace.
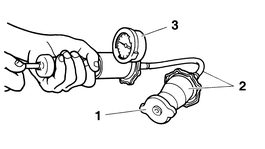
3.Check:
-
Radiator cap valve opening pressure
a.Install the radiator cap tester adapter “2” and the radiator cap tester “3” to the radiator cap “1”, and activate the tester to check whether it can stay for 5 to 10 seconds within standard pressure values.
|
|

No stay → Replace.
|
INSTALLING THE RADIATOR
1.Fill:
-
Cooling system
(with the specified amount of the recommended coolant)
Refer to CHANGING THE COOLANT.
2.Check:
-
Cooling system
Leaks → Repair or replace any faulty part.
3.Install:
-
Radiator cap tester “1”
-
Radiator cap tester adapter “2”

-
-
Radiator cap tester
90890-01325
-
Mityvac cooling system tester kit
YU-24460-A
-
Radiator cap tester adapter
90890-01352
-
Pressure tester adapter
YU-33984
-
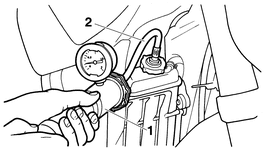
4.Activate the tester to apply the test pressure.
|
|

5.Check:
-
Pressure value
No stay for 5 to 10 seconds at the test pressure value → Correct.
-
Radiator
-
Radiator hose connection
Coolant leaks → Correct or replace.
-
Radiator hose
Bulges → Replace.

-
When the radiator cap tester is removed, coolant will spout; therefore, cover it with a cloth beforehand.