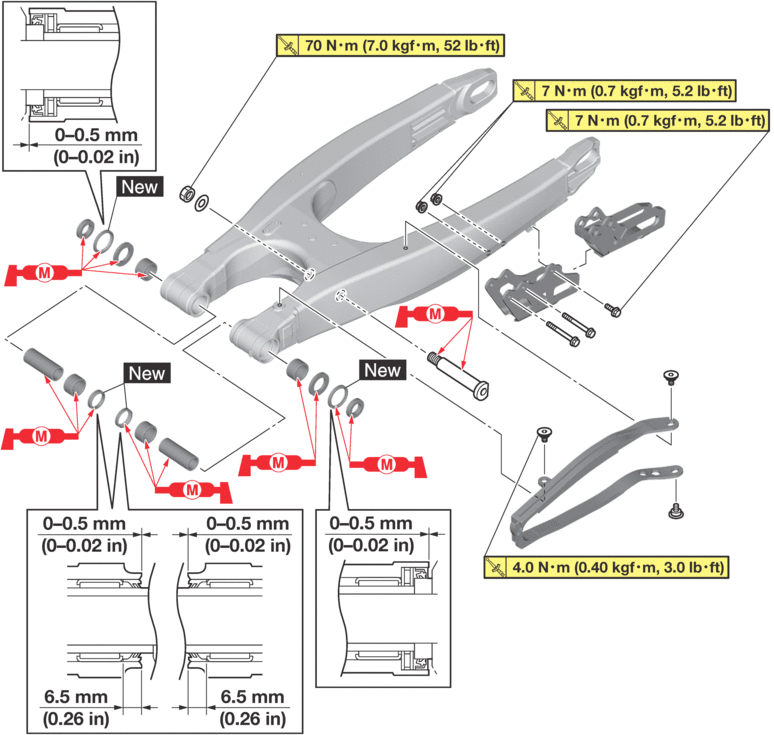
SWINGARM
|
Removing the swingarm  |
|||
|---|---|---|---|
|
Order |
Job/Parts to remove |
Q’ty |
Remarks |
|
|
|
|
Use a maintenance stand to raise the rear wheel off the ground. |
|
|
Brake hose holder |
|
Refer to REAR BRAKE. |
|
|
Rear brake caliper |
|
Refer to REAR BRAKE. |
|
|
Bolt (brake pedal) |
|
Refer to ENGINE REMOVAL. |
|
|
Drive chain |
|
Refer to CHAIN DRIVE. |
|
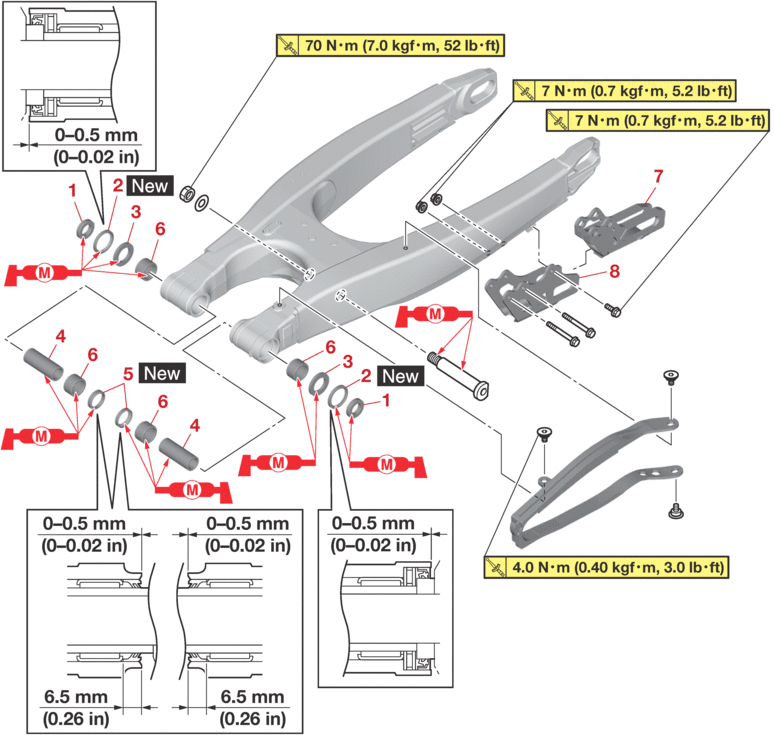
Removing the swingarm  |
|||
|---|---|---|---|
|
Order |
Job/Parts to remove |
Q’ty |
Remarks |
|
1 |
Collar |
2 |
|
|
2 |
Oil seal |
2 |
|
|
3 |
Thrust bearing |
2 |
|
|
4 |
Bushing |
2 |
|
|
5 |
Oil seal |
2 |
|
|
6 |
Bearing |
4 |
|
|
7 |
Drive chain support |
1 |
|
|
8 |
Drive chain support cover |
1 |
|
REMOVING THE SWINGARM
1.Use a maintenance stand to raise the rear wheel off the ground.
|
2.Measure:
-
Swingarm side play
-
Swingarm vertical movement
a.Measure the tightening torque of the pivot shaft nut.
|
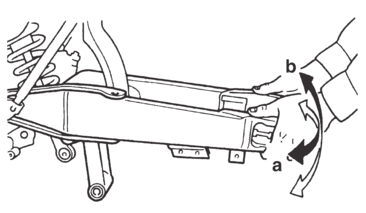
b.Check the swingarm side play “a” by moving the swingarm from side to side. If the swingarm has side-to-side play, check the bushings, the bearings, and the collars.
c.Check the swingarm vertical movement “b” by moving the swingarm up and down.
If swingarm vertical movement is not smooth or if there is binding, check the bushings, the bearings, and the collars.

CHECKING THE SWINGARM
1.Check:
-
Swingarm
Bends/cracks/damage → Replace.
2.Check:
-
Pivot shaft
Roll the pivot shaft on a flat surface.
Bends → Replace.
|
3.Wash with kerosene:
-
Pivot shaft
-
Bushing
-
Collar
-
Bearing
4.Check:
-
Oil seal
Damage → Replace.
-
Bearing
-
Bushing
Free play exists/unsmooth revolution/rust → Replace bearing and bushing as a set.
INSTALLING THE SWINGARM
1.Lubricate:
-
Bearing
-
Thrust bearing
-
Collar
-
Bushing
-
Oil seal
-
Pivot shaft
|
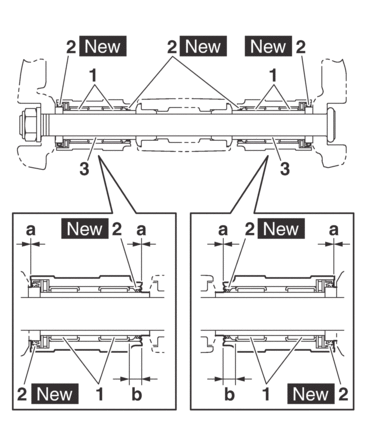
2.Install:
-
Bearing “1”
-
Oil seal “2”

(to the swingarm)
-
Collar “3”
|
|

3.Install:
-
Swingarm
|
|
4.Install:
-
Drive chain support
-
Drive chain support cover
|
5.Install:
-
Rear wheel
Refer to REAR WHEEL.
6.Adjust:
-
Drive chain slack
Refer to DRIVE CHAIN SLACK.
|


